
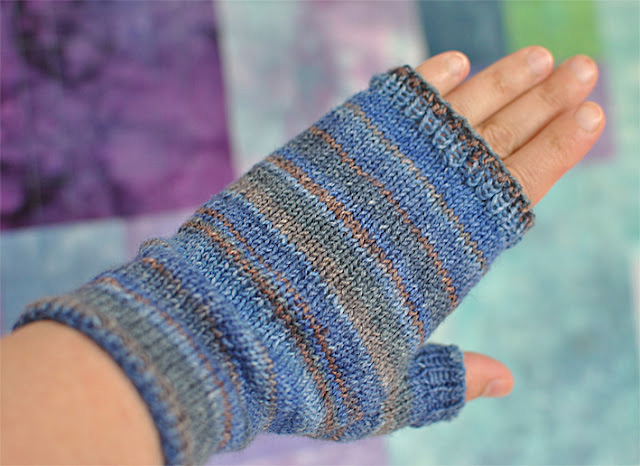
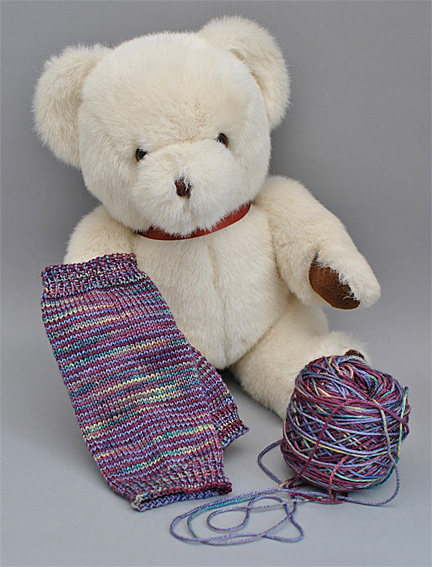
The fingerless mittens knitting pattern is a quick project that uses a small amount of yarn. I have found that I often have enough yarn left after knitting a pair of socks to knit these.
The pattern was designed for my sister who wanted to knit a pair of fingerless mittens using the lovely Mini Mochi yarn. I used Trekking sock yarn from my stash in shades of blue, taupe, grey and russet to knit a pair of fingerless mittens for myself. I like using sock yarn to knit fingerless mittens because the wool element gives warmth and comfort while the nylon element adds durability to the mitten. But any 4-ply sock yarn can be used to knit this pattern successfully.
The Pattern
Knit two of the same mitts for the pair – there is no difference between right and left hands in this basic fingerless mitten pattern.
Abbreviations:
- dpns – double-pointed needles (I prefer bamboo needles)
- k1 – knit 1 stitch
- p1 – purl 1 stitch
- st st – stocking stitch = knit all stitches when working in the round
- m1L & m1R – Twist Collective shows how to do this here.
- k – knit
- sts – stitches
Materials:
- 1 ball of sock yarn or 4 ply yarn (approx 40g)
- set of 2.75mm dpns
- stitch marker
- sewing needle
Using 2.75mm dpns and 4 ply sock yarn cast on 52 sts loosely. I use a slightly larger-sized needle, usually 3.25mm, to cast on and then change to the 2.75mm needles before starting the rib.
Cuff
- On the first round of k1, p1 rib join into a round (13 sts on each dpn needle).
- Work 3 more rounds of rib for the narrow rib.
- (I also do a version with a deeper rib and for it, I work 9 rounds of rib).
Then knit 21 rounds of stocking stitch or the length you would like for the wrist section.
Shaping for Thumb
- Set up round: m1L, place marker, k to the end of the round
- Round 1: k to the marker, slip marker, k to the end of the round
- Round 2: m1R, k to marker, m1L, slip marker, k to the end of the round
- Repeat rounds 1 and 2 until there are 21 sts between the marker and the start of the round. These are the thumb sts.
- Then k 5 rounds slipping the marker each time you reach it.
Hand
- Next: place the 21 thumb sts onto a piece of waste yarn and remove the marker.
- Cast on 2 sts (the easiest way is to make loops onto the needle you have just finished knitting with). The 2 new sts will be part of the thumb. K to the end of the round. (54 sts)
- Next: k 21 rounds (16 rounds if you chose to knit the deeper cuff).
- Work 4 rounds of k1, p1 rib (8 rounds of k1, p1 rib for deeper rib edge).
- Cast off in rib.
Thumb
- Slip the 21 sts that are on the waste yarn onto 2 dpns.
- Starting in the centre of the 2 cast-on sts pick up and k3 sts then k5 sts from the needle – you have 8 sts on needle 1.
- k10 sts onto needle 2.
- k6 sts onto needle 3 and then pick up and k2 sts – you then have 8 sts on needle 3. (26 sts for the thumb)
For thumb with narrow rib:
- k 4 rounds in st st
- Then work 4 rounds of k1, p1 rib
- Cast off in rib.
For thumb with deeper rib:
- k 2 rounds in st st
- Then work 7 rounds of k1, p1, rib
- Cast off in rib.
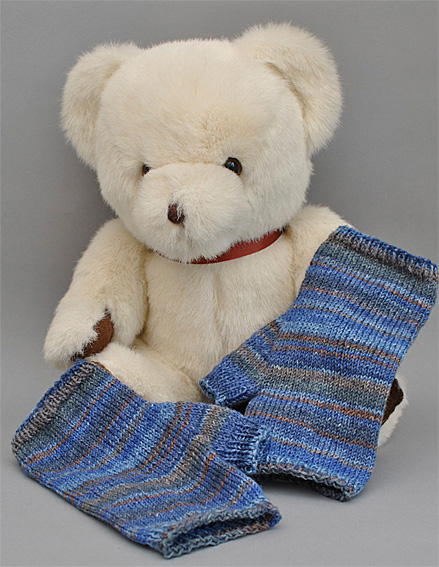
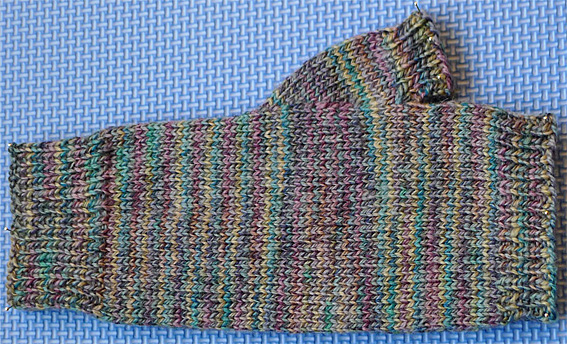
I used a skein of hand-dyed sock yarn by Flamboyance Yarns to knit the deeper cuff version for my sister. Brocade is sumptuously dyed in shades of bramble berry, grey, and mauve with a touch of teal, green and rust… in a splendid wool, cashmere and nylon blend.
I hope you enjoy knitting the Fingerless Knitting Pattern. It is a great way of showing off the lovely colours in hand-dyed sock yarns and uses a small amount of yarn. You will often have enough yarn left over from knitting a pair of socks to be able to knit a pair of fingerless mittens.
Finishing
Sew in any loose ends. If you have any little gaps where you have joined the yarn for the thumb you can close these up as you do this.
To Block or Not to Block?
In the main, you don’t need to block your fingerless mittens. However, if you have been knitting a fair isle or stranded pattern you will find that the blocking process smoothes out any irregularities in your knitting. The only time I block basic fingerless mittens is when they are destined to be a present for someone else. I pin out both mittens together so that they are identical.
I hope that you have enjoyed knitting the fingerless mittens. Please leave your comments about knitting this pattern.
What size would the finished mitten be?
Hello, I know ths pattern is a bit old now but I just came across it before Christmas. It’s a beautiful pattern but I’m really struggling with the thumb bit. I have the stitches on the 2 dpns but can’t make head or tail of the instructions after that. Do you have pictures or a youtube video I can see?
Thank you.
Love this pattern! I’ve made 2 dozen pairs at least as gifts for family & friends, in oodles of colors. It’s the first pattern I reach for every autumn when the temperature starts to dip. Everyone loves them. Thank you!
Thank you!
I just finished a pair of fingerless gloves.
May you use straight needles?
You could but you will have a seam.
Great pattern, adjusted to suit DMC 4 ply 100% Baby Merino
About to finish 4th pair with others lined for friends.
Hello Nicolette
I’ve just finished making these albeit with a few adjustments to suit the DMC 100% Baby Merino wool. Delighted with the outcome. Over 60 years since I’d done thumbs and your way makes such a neat job.
I wish I could send you a photo but don’t think I can.
Making for friends as presents now as we are coming into our winter.
Regards
Hilary Marks
Motueka New Zealand
Hi Nicolette, I love this pattern! Thank you very much for taking the time to share it! I found a very nice yarn from Fleece Artist and the result is just lovely and I am now knitting a pair for my daughter. I wish you a speedy recovery from your injuries. 🙂
So pleased you are happy with them.
I have trouble understanding the pattern section for setting up the thumb.
Isn’t the end of the row and the marker the same place? Should I place a second marker for the end of the row to make it clearer? What do you mean when you say “knit to end of row” – is that where the new stitch is..?
Thanks for your help.
I am using this pattern with 4ply wool on 2.5 needles and so far it seems to be the right size for my 9 yr old grandson!
Regards,
Kristine
I’m sorry I cannot help you at the moment, I’m recovering from a broken wrist and ankle.
I hope you have had a good recovery?
Not the same. It will help if you place a marker at end of row, then M1L, place marker, and K to end, slip marker. Round 1: knit to marker means you will knit the M1L you made last row. Slip marker and k around, slip marker at end. Round 2: M1R, K to marker. So you will be adding a M1L immediately before the marker. Slip marker and k around. As you progress, you will have a marker on either side of your increases. Definitely easier to add that marker at the end of the round. It will signal your starting point. I just finished these a few minutes ago. Loved knitting them.
It will help if you place a marker at end of row before you start set up round, then M1L, place marker, and K to end, slip marker. Round 1: knit to marker means you will knit the M1L you made last row. Slip marker and k around, slip marker at end. Round 2: M1R, K to marker. So you will be adding a M1L immediately before the marker. Slip marker and k around. As you progress, you will have a marker on either side of your increases. Definitely easier to add that marker at the end of the round. It will signal your starting point. I just finished these a few minutes ago. Loved knitting them.
Hi
Love the pattern but I am stuck already.. Working on the set up for the thumb.. The following part.
Set up round: m1L, place marker, k to end of round
Round 1: k to the marker, slip marker, k to end of round
Round 2: m1R, k to marker, m1L, slip marker, k to end of round
Where is the beginning of the round? I thought the marker would be the beginning.. am I supposed to designate the beginning of the round with another marker? thank you so much
I’m sorry I cannot help at the moment. I’m recovering from a broken wrist and ankle. Perhaps someone else can help?
It will help if you place a marker at end of row before you start set up round, then M1L, place marker, and K to end, slip marker. Round 1: knit to marker means you will knit the M1L you made last row. Slip marker and k around, slip marker at end. Round 2: M1R, K to marker. So you will be adding a M1L immediately before the marker. Slip marker and k around. As you progress, you will have a marker on either side of your increases. Definitely easier to add that marker at the end of the round. It will signal your starting point. I just finished these a few minutes ago. Loved knitting them.
Hi, the link for instructions for m1R and m1L doesn’t work! Any advice? Thanks!
Thank you for letting me know. I’ll look at them. In the meantime if I’m looking for help I either google it or I look it up in one of the knitting handbooks such as Vogue Knitting The Ultimate Knitting Book to name one. The only reason I’m mentioning it over others is because it is out on the table beside me. There are lots of useful and very helpful Youtube videos to choose from too.
Love your site! Stumbled across it looking for pictures of Branches and Buds to show my husband. Thank you for posting such nice tutorials. I will be starting a mitred-square blanket soon! Again, thank you for your great tutorials!
Esther
Welcomeasflowerstheinmay
Hi. Just found your site and loving it. With your patterns for socks and gloves can a teeny circular be used in place if DPNs? I know for heels and toes I’ll need DPNs but for the rest?
Also the link to M1L and M1R above doesn’t work anymore.. any chance of an explanation?
Thank you for this basic pattern. I have been looking for one because I just want to enjoy the colors of the yarn not fancy patterns for now.
Have been searching for a fingerless mitten pattern for a long time. Yours is perfect but I can’t seem to find out where I can download the pattern. Another question on the increases can I use kfb stitch. Looking forward to hearing from you.
You can use kfb but you will have a little purl bar at the increase whereas the m1L and m1R will be a little more invisible. I haven’t created a pdf of the pattern.
Love your pattern and beautiful yarn choices. I wish you had a PDF or printable version. I can’t write or make pattern notes on my iPad.
I’ll look at creating a pdf of this in the New Year.
Love the pattern
Can I use fingerling yarn? Also on the increases can I use the kfb stitch.
I used 4ply sock yarn which is similar in weight to fingering weight although fingering weight can be a little bit finer. Although I haven’t used fingering weight, I have used a couple of Indie dyed skeins of sock yarn which were closer to fingering weight and the finished fingerless mitts were successful. They were both given away as presents.
Thank you for answering my questions. Guess it’s time to learn a new stitch. I may have more questions.
Fingerless mittens. 13 stitches on each needle. On 3 needles # 39 stitches. I put 16 – 20 – 16. Maybe this can help some knitters. Thank you for this very nice & easy patern
Nice pattern
How do you divide the 52 stitches on 3 needles
I like tis pattern. But you should mention that it is done on a set of 5 needles, as you mentioned 13 stitches on each needle. or 17 sts. on 2 needles and 18 sts on third needle, or does it matter if you use 3 or 4 to divide the stitches?
Hi Gigi, I’m in the UK and normally, when I’m knitting on double pointed needles I use a set of 5 needles and whether I’m knitting fingerless mittens or socks, the stitches are always evenly spread across 4 needles and I am knitting with the 5th needle. Happy knitting, Nicolette
I just found your pattern and would like to try my first pair. I have super fine sock yarn, 1 ply. I have dp size 2 and 3. My hands are about a medium size. In your opinion would my dp and yarn work up ok in these mitts?
Thank you.
You were kind enough to answer my question on this many months ago. I never thanked you for your response, very sorry about that! I wasn’t exactly sure on your answer but have not gotten back to the mittens. 8 stitches to 1 inch wide is the gauge I believe.
Anyway, Happy Holidays!!
Yes, 8 stitches to 1 inch is the gauge. I hope you will enjoy your finished fingerless mitts. I also have long term WIPs. Happy holidays.
Do you think I could knit these gloves on my circular needles and adapt your pattern to make full mittens? Cant find a 4ply pattern for full mittens anywhere. Thank you.
I don’t see why not. You could use something like the round toe shaping for shaping the end. That toe shaping is about one and a half inches long. The round toe shaping looks nice from any angle. Just a matter of trying the mitten on to see where you should start the shaping and I’d keep a note of how many rows you knit so that you can make both the same. I’d love to see a photo of your finished mittens to see how they turn out. That would be so interesting.
Thank you for this pattern. Very kind of you to share your talent.
Thank you Donna, I hope you enjoy the pattern. Nicolette
I’m really confused by the second part of the thumb section. What do you mean by pick up?
“Starting in the centre of the 2 cast on sts pick up and k3 sts then k5 sts from the needle – you have 8 sts on needle 1.
k10 sts onto needle 2.
k6 sts onto needle 3 and then pick up and k2 sts – you then have 8 sts on needle 3.”
When you have placed the 21 stitches for the thumb (that have been on the piece of waste yarn) onto 2 double pointed needles, you will have a section where you had cast on 2 stitches before you started knitting the hand. You start in the middle of this section and you pick up and knit (make) 3 stitches, then knit 5 stitches (giving you 8 stitches on needle 1). knit 10 stitches onto needle 2. Then using needle 3 knit 6 stitches, then pick up and knit 2 stitches (from the other half of the gap created by the 2 cast on stitches). This gives you a total of 26 stitches spread over 3 needles that you will be knitting to make the thumb.
I hope this is of help to you Catie. Happy Knitting, Nicolette
What’s the difference between making a stitch (m1) and knitting a stitch (k1). I just got to the thumb part after doing my 21 rounds. I have no clue what I’m supposed to do next. m1???? what does that mean? Thanks.
Make 1 or m1 is a generic way to say ‘create one new stitch’. So basically, every time you read m1 it means you are increasing by one stitch. Tincanknits explains how to do an m1 very clearly here. I hope that helps you Sheila.
Your pattern is very well written but too big for me. How would I make it smaller.
You could cast on fewer stitches, used smaller sized needles or rib part of the stocking stitch section.
Use smaller size needles, cast on fewer stitches, or rib a section of the stocking stitch from the cuff at the wrist to the lower cuff.
Well I love your blog ,found you just yesterday.I think I’m a processor ha ha !
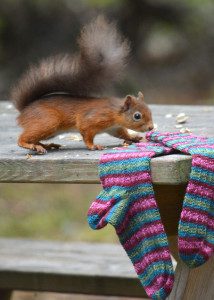
I’m now half way through my first mitten. It’s just great thankyou…oh and the squirrel ,he’s just adorable !
Thank you so much ,
Thank you for commenting on the Knitting Squirrel. I’d love to see a photo of your finished mittens. I love the squirrel – he was made by a fabulous artist in Alaska! I bought him on Etsy.
i love this pattern and have started working on a pair! one question i have about the shaping for the thumb… in round 2, should i slip the marker before or after the 2nd M1? thank you for your help and for the pattern!
I have the same question that Rana had…. “Shaping thumb round 2 reads: M1R, knit to marker, M1L, slip marker, knit to end”. Do I slip the market before or after M1L? Thank you for this pattern….just need this clarified.
I also have this question. I have 21 stitches between the marker and 21 new stitches right before the marker. These arent accounted for in further steps but the instructions say slip before m1l 🙁
Love this pattern.. have shared on Facebook 🙂
Thank you.